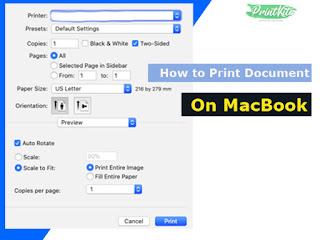
Print any document or photo on a MacBook is easy. You can print almost from every software. You can print in color, black and white, or two-sided on a Mac. Here is a step-by-step how-to print on a Mac using the Apple Tool Bar or keyboard shortcuts.

How to Print on MacBook
To print a document on a MacBook, you can both click File > Print from the Apple Tool Bar or use the Command + P keyboard shortcut. The next step is to select your printer from the printer menu at the pop-up window and then click the Print menu button. About 1 minute
- Open the fileOpen your image photo or document you want to print
- File menuClick menu File in the Apple menu bar
- Print menuClick menu Print at the bottom of the menu
- Select printerThen select your printer from the Printer menu
- Number of copiesThen, change the number of copies you want to print
- Select colorIf you need to print in a black and white document, thick the Black & White checkbox either you can leave it blank
- Choose page(s)Next, select which pages you want to print, a single page, or all pages, or choose a range of pages you want to print
- PrintingIn the last step, click the Print button.
Advance Print Settings on Mac
If you print a document, manage the Print dialog to select your print settings. To view advanced print settings, click Show Details at the bottom of the print dialog.
From the advance print settings, you can change the paper size of the document, enlarge or reduce a printed document, choose two-side printing, scale a document to fit your printer’s paper.
You might see different options in the Print dialog depending on your printer and the software you’re using. If this guidance different from what you’re seeing, verify the documentation for the application you’re using by clicking Help in the menu bar.
0 Response to "How to Print Document or Photo on MacBook "
Post a Comment